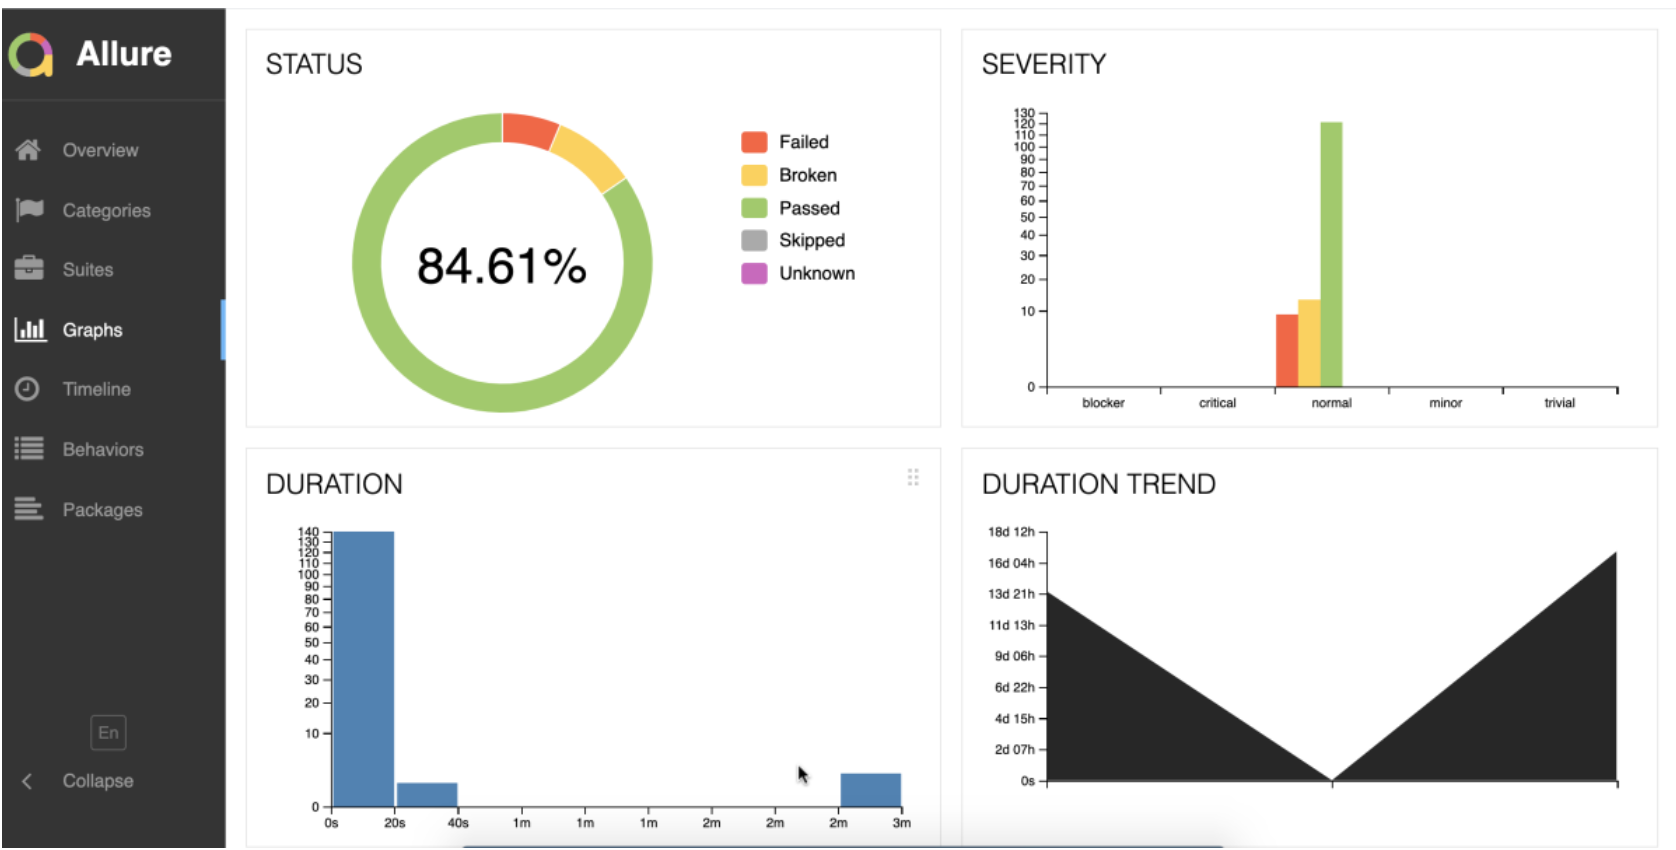
How to serve an Allure Report on GitHub Pages: A Step by Step Guide
Automated testing is an essential part of software development, ensuring that your application runs smoothly and without errors. One way to visualize the results of these tests is by using Allure Reports, which provide a clear and interactive overview of test execution and outcomes. But how do you make these reports easily accessible to your team? The answer is GitHub Pages. In this blog post, we’ll guide you through the process of serving an Allure Report on GitHub Pages
Why Use GitHub Pages for Allure Reports?
GitHub Pages offers a free and simple way to host your project’s documentation or, in this case, your Allure Reports. By making these reports available on GitHub Pages, you ensure that your team can easily access them anytime and anywhere, facilitating better communication and quicker decision-making based on test results. This setup is especially beneficial for automated testing, as it allows for continuous integration and delivery processes, making your development workflow more efficient and streamlined.
Step 1: Create a New Branch
First things first, you’ll need to create a new branch in your GitHub repository. This branch is typically named gh-pages. Here’s how:
-
- Go to your GitHub repository.
-
- Click on the branch selector menu at the top left.
-
- Type a name in the new branch text box(in my case allure-report).
-
- Click the “Create branch: allure-report” from the dropdown.
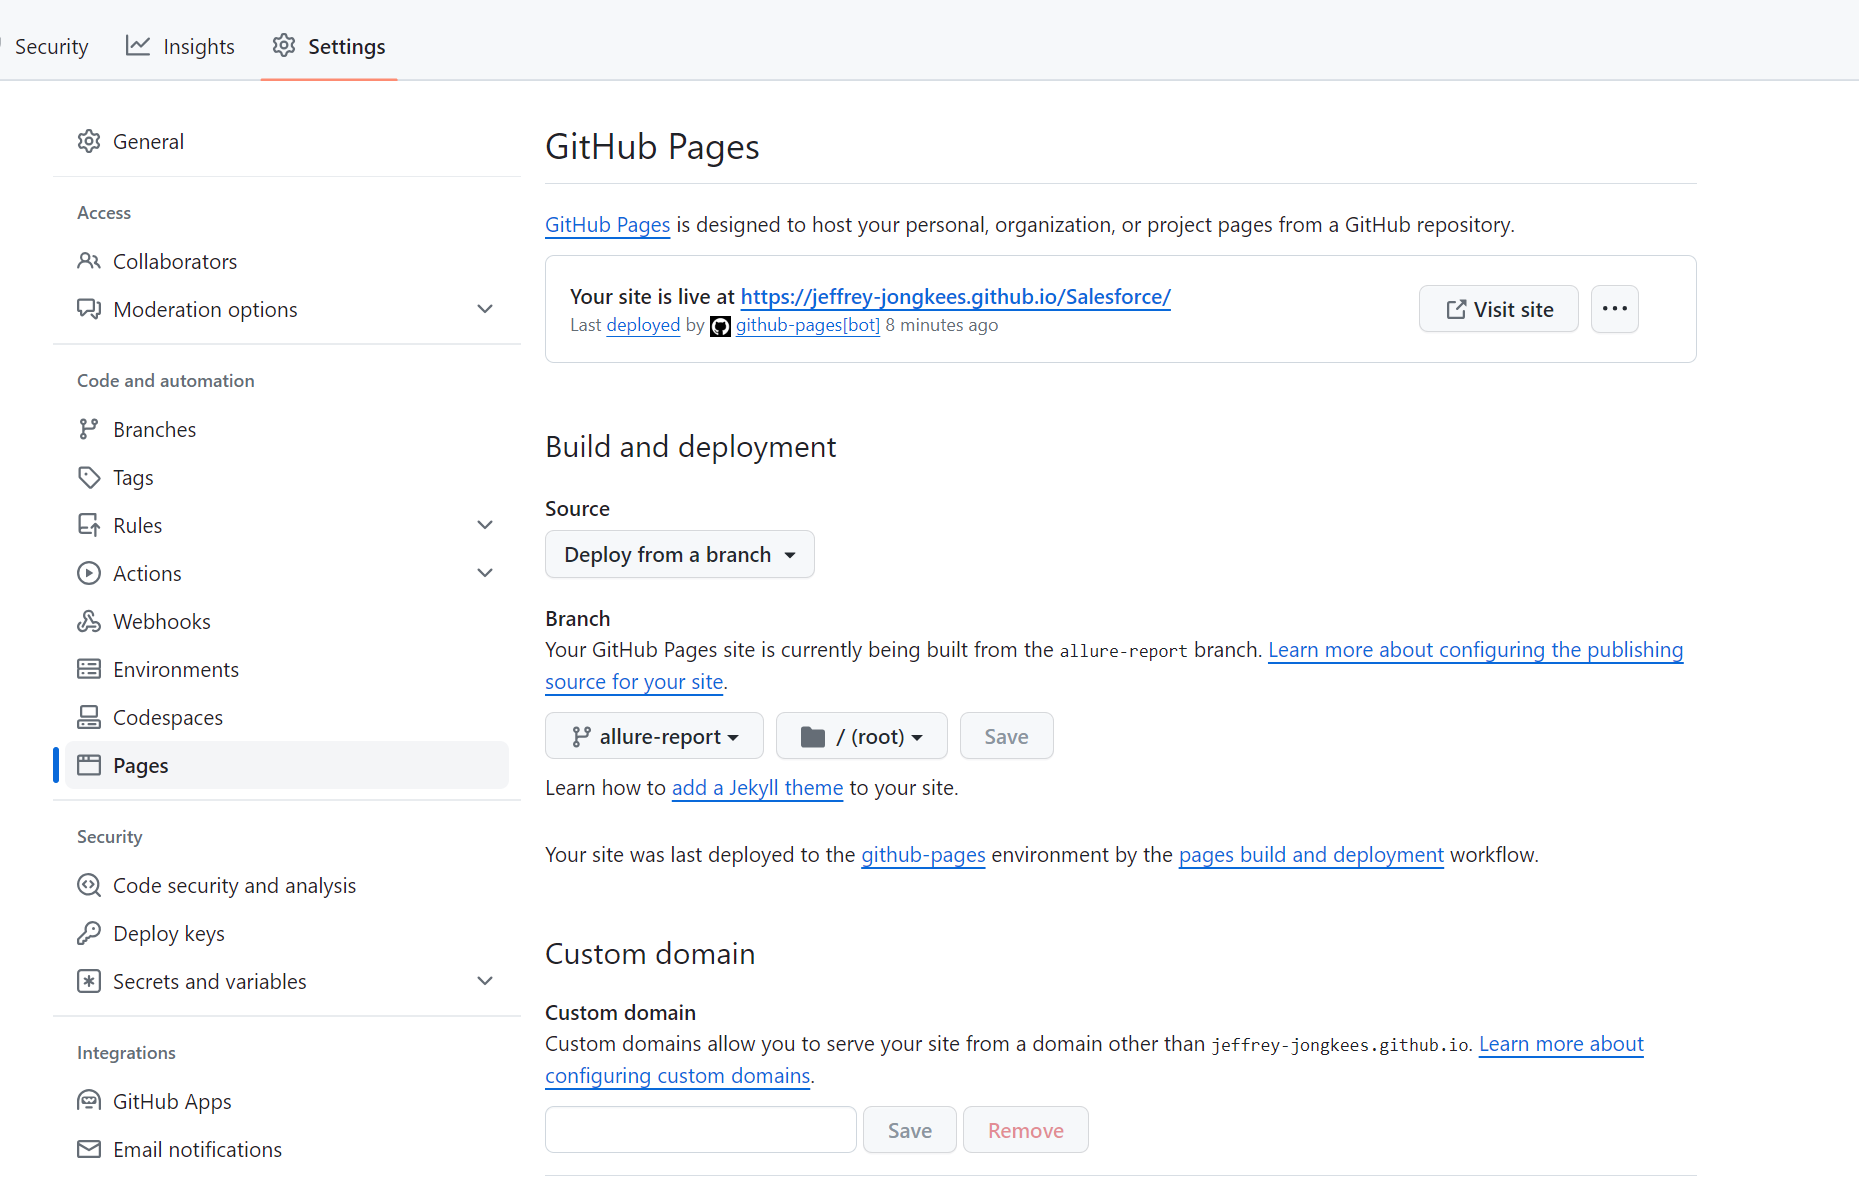
Step 2: Set Up GitHub Pages
Next, you’ll set up GitHub Pages to serve content from the allure-report branch.
-
- In your repository, go to “Settings” > “Pages.”
-
- Under “Source,” select the allure-report branch from the dropdown menu.
- Click “Save.”
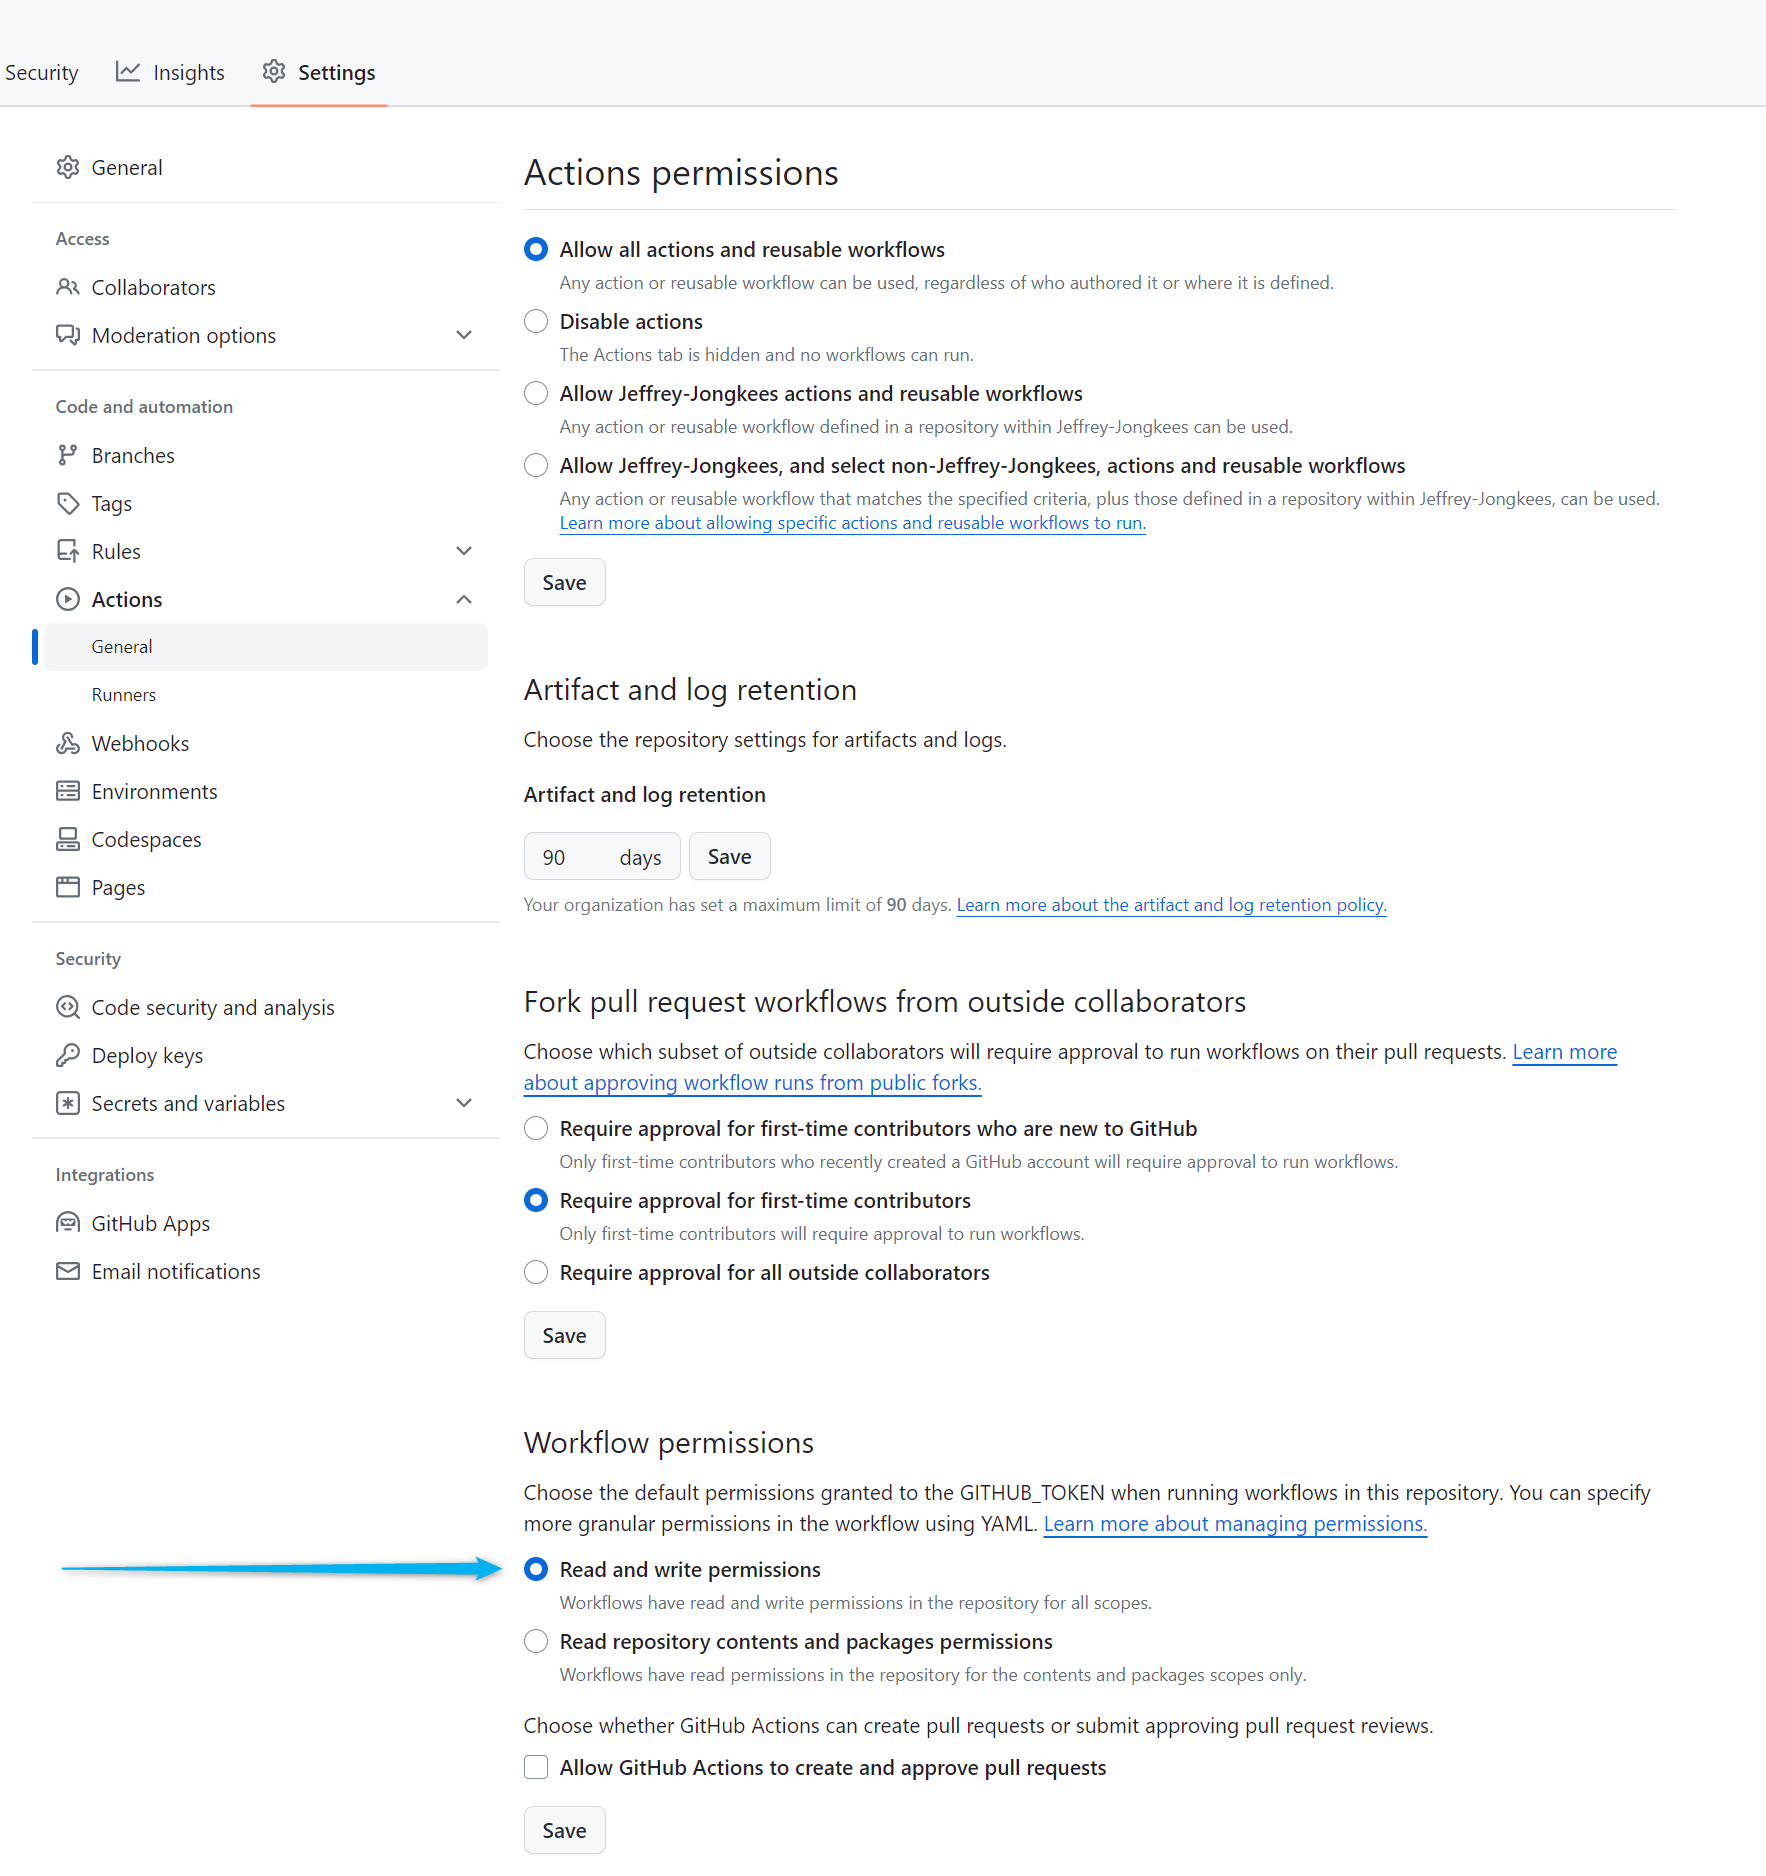
Step 3: Configure Workflow Permissions
For GitHub Actions to deploy your Allure Report to GitHub Pages, you need to adjust the workflow permissions to allow read and write operations.
-
- In your repository, go to “Settings” > “Actions” > “General.”
-
- Scroll down to “Workflow permissions.”
-
- Select “Read and write permissions.”
-
- Save your changes.
Step 4: Add the Deploy Step in a YAML File
Finally, you need to add a deploy step in your GitHub Actions workflow to automatically generate and publish your Allure Report to the allure-report branch. You’ll do this in a YAML (.yml) file inside the .github/workflows directory in your repository. If this directory doesn’t exist, you’ll need to create it along with your YAML file.
Here’s an example of what the deploy step looks like in my yml file:
## Allure report
- name: Generate Allure Report
        run: |
          npm install -g allure-commandline
          allure generate allure-results -o allure-report --clean

   ## Deploy step
- name: Deploy Allure Report to GitHub Pages
        uses: peaceiris/actions-gh-pages@v3
        with:
            github_token: ${{ secrets.GITHUB_TOKEN }}
            publish_dir: ./allure-report
            publish_branch: allure-report
            keep_files: false
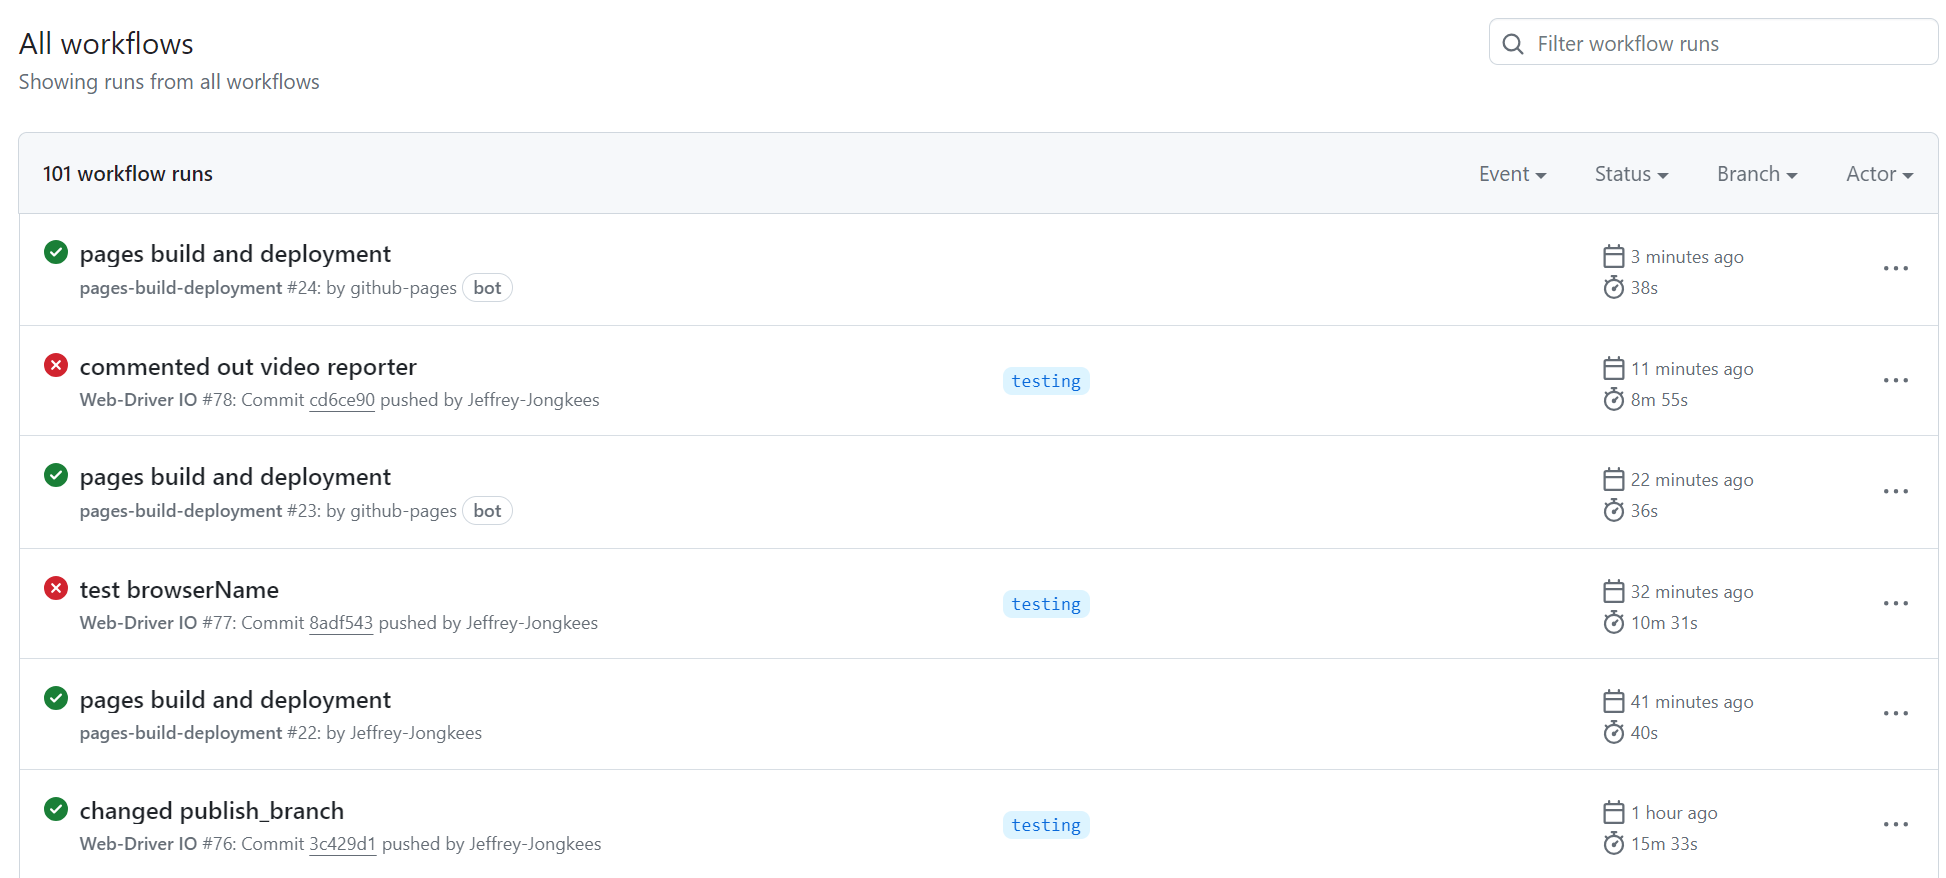
This step uploads your Allure Report as an artifact of your workflow. You will need to customize the path to where your Allure Report is generated in your project.
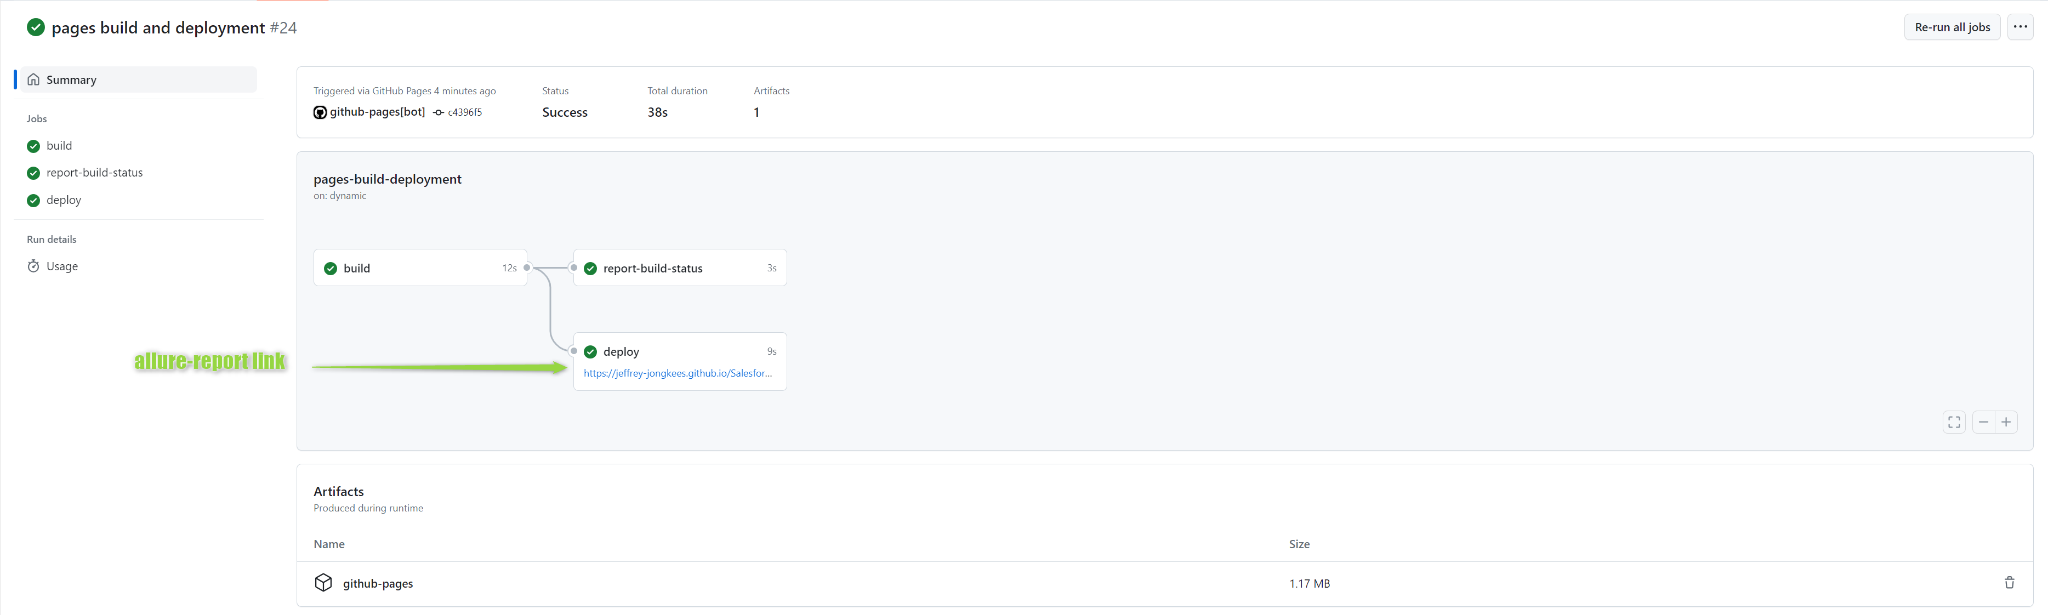
Following the completed run tests, a pages build and deployment job will be run to deploy the allure-report automatically to the allure-report branch. Here you can find a link (which you can share with your peers or managers) to the report.
Conclusion
By following these steps, you can easily serve your Allure Reports on GitHub Pages, making them accessible to your team and enhancing your automated testing process. This approach not only improves the visibility of your test results but also integrates seamlessly with your existing GitHub workflow, making your development process more efficient and collaborative.